Linux System - Written by Ahmer Tahir
How To Setup Multiple Static IPS On Ubuntu 22
Introduction
In this tutorial you will learn How to set up multiple static ip addresses on the Ubuntu 22 Desktop. It can be done on other Distros with Desktop Environments. These multiple ips will be available on SSH so you can access it with any ip you create.
Prerequisites
Here is what you should Know before setting up IPs:
- For Virtual Machines, change Network Adaptor Setting to Bridged (Image Below)
- IPs will be assigned to the Network Adaptor/Interface.
- Physical servers or pcs does not need any Bridged setting change
- First IP address will be default IP
- Changes will be permanent. So restarting VM/PC/Server will not reset IPs
- You can use UFW for Firewall Setups with each
- Multiple Adaptors can be configured with IPs
- Static IPs can not be assigned to the Wireless Adaptor
Recommendations
Here is some recommendations for static ips:
- Must configure firewall for protection
- You have to find network settings to be able to setup static ips
- You should know the Default Gateway
- DNS Nameservers can be your Router Login IP or Google or anything
- You can restrict SSH Access on single IP from UFW
- Multiple IPs works great with LAN Cache Server
Step To Follow:
We will follow these steps to setup ips without any issue:
- Setup VM to Bridge (Optional)
- Network Settings
- IPv4 Address Setup
- DNS Nameservers Setup
- Restart Networking
- Test Internet Connection
Step 1 — Setup VM to Bridged
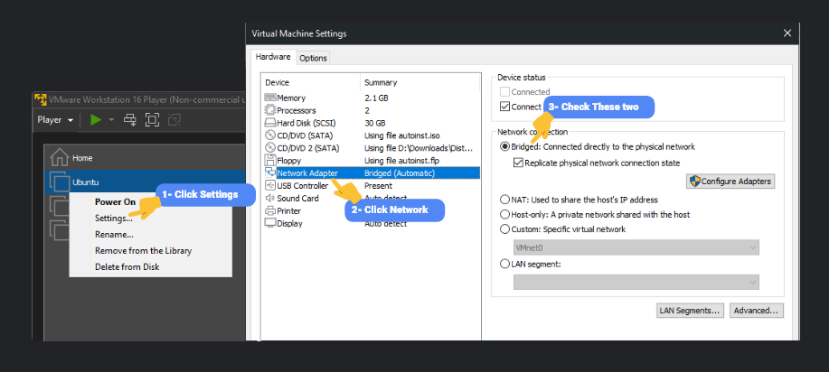
If you are using Virtual Machine then you have to set your VM’s networking to Bridged. Do this if you are using a Virtual Machine, a physical computer does not need it. If you don’t do it then your VM will not be able to Access the Internet or set Default Gateway.
What will happen to the VM with Bridged? It will make your VM available as a Physical Device to Port Forward. It will be like a PC connected to your Modem/Router like a real Physical Computer. That’s why it is important to Bridge your VM. In my case I'm using VMWare Workstation Player so here is how to bridge the connection.
 Step 2 — Network Settings
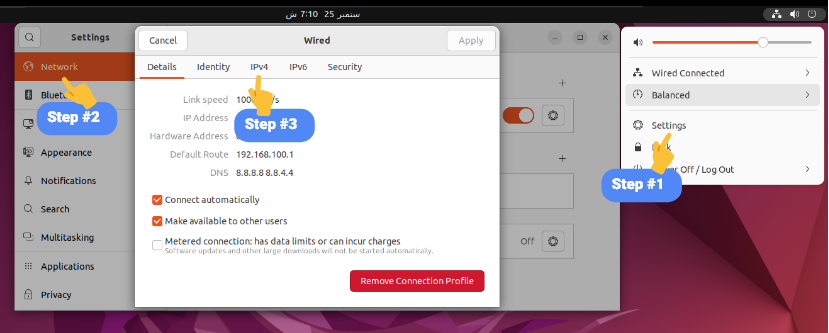
After successful Bridged connection, start your PC or Virtual Machine. Opening network settings can be varied with Desktop Environments. But we are using Ubuntu 22 Default Desktop Environment so here is how you can access Network settings.
Step 3 — IPv4 Address Setup
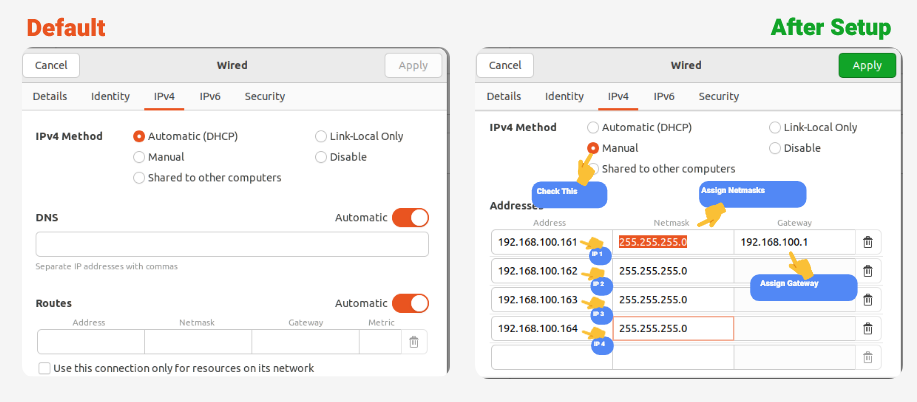
IPv4 are the IP Addresses that you will assign so navigate to IPv4 and in the image you can see your default IP Address. DHCP is Dynamic Host Control Protocol which explains why your IP will change every time you reboot your device. Here are the step how to do it:
- Check Manual IP
- Ip address field is where you will write your IP Address
- More fields will auto appear after adding one
- Netmask can be 255.255.255.0 or 24
- Default Gateway is your Modem/Router’s Access IP
- Default gateway is only assigned to first IP Address
 Step 4 — DNS Nameservers Setup
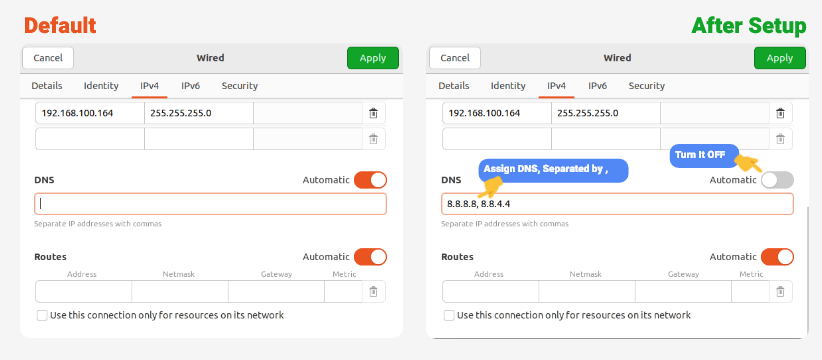
Now you have to set up DNS Nameservers which is easy. You can use any DNS server we are going to use Google DNS Server which are 8.8.8.8 and 8.8.4.4 Remember, always separate the DNS Nameservers with , comma if you are using two or more DNS nameservers. No need to put a comma if you are using just one DNS.
You can also use your Router/Modem Default Gateway Address as DNS. DNS Server will make your Internet faster to access websites. Left Image is How it will look like without Setup and Right will be after Setting Up.
 Step 5 — Restart Networking
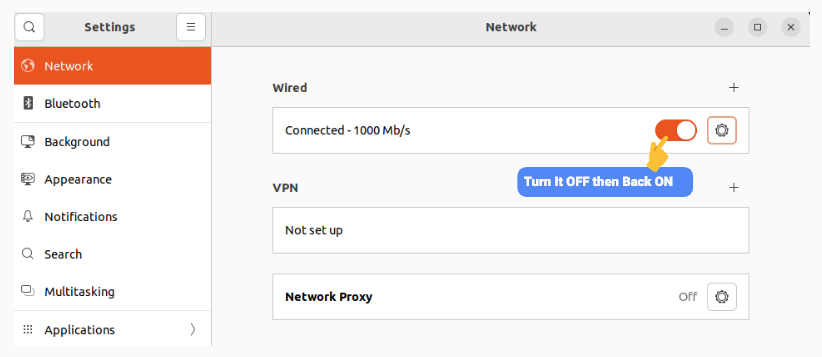
Now for changes to take place, you have to restart your networking or reboot your VM or PC. You can turn on/off the button in the settings to restart the networking.
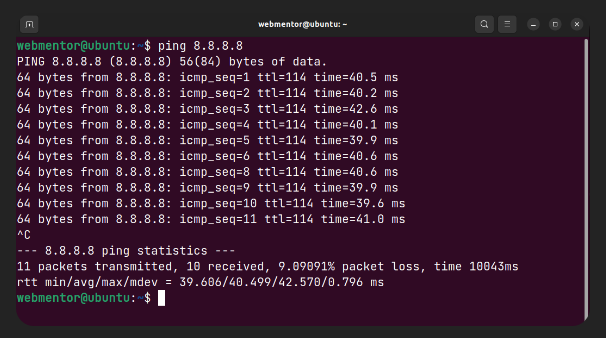
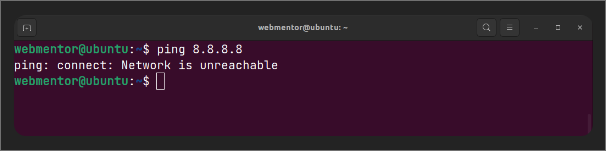
 Step 6 — Test Internet Connection
If you have done everything correctly, then your VM or PC should be able to access the internet. If anything is wrong then then your internet will not work.
We should simply use the command line and ping the ip address like in the image. If the result of ping is simple unreachable then there is an error otherwise ping will show latency 1ms